Using Scheduled Scripts
Once you create a script that works for you, you can schedule it to run on a regular basis. Scripts can be run on the fly as temporary ad hoc scripts, or you can create and schedule scripts to run on a regularly scheduled basis, with the results sent to an application or data store of your choice. The schedule increments run from 5 minutes to 30 days. For example, you can schedule a job to run every 5 minutes for 72 hours; or every 24 hours minutes for 72 hours (that is, once a day for 3 days).
-
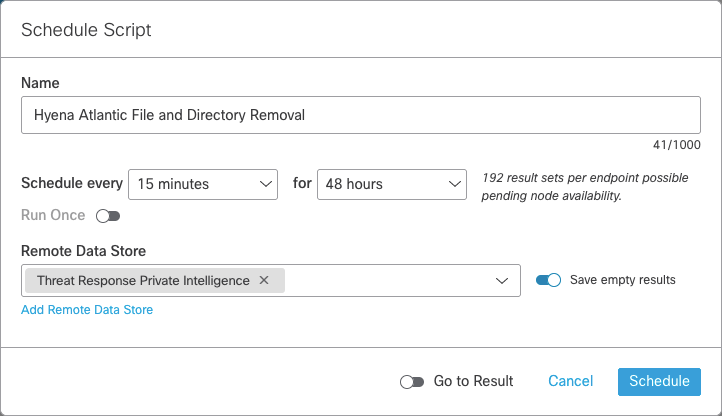
Create the script you want to have run on a scheduled basis and click Schedule Script. The Schedule Orbital Script popup window opens, as shown in the figure below.
-
Define the script's schedule by providing the parameters for the following popup elements.
-
Type the name of the script in the Name field. This is the name of the script's schedule that will be listed in the Results page. You do not have to provide a name to the script's schedule. If you wish, you can choose to use the default schedule name.
-
Set the script schedule's frequency using the Schedule every dropdown. Click the down arrow on the right side of the Schedule every dropdown, then select the appropriate value. Refer to the top paragraph of this topic for a definition of frequency.
-
Set the script schedule's duration using the for dropdown. Click the down arrow on the right side of the for dropdown, then select the appropriate value. Refer to the top paragraph of this topic for a definition of duration. Refer to the for element definition in the
-
Select the Run Once toggleswitch if you wish to have the script's schedule run once in the next 24 hours. Selecting this toggleswitch will cancel any values you set for the Schedule every and for dropdowns.
-
Us the Remote Data Store dropdown to select the remote data store source where the script's results will be sent during its run.
-
Select the Save empty results toggleswitch if you wish to include script results where the endpoint has not returned any result values.
-
Use the Add Remote Data Store link to add a new remote data store, if the data store or stores you need are not listed in the Remote Data Store dropdown. Clicking this link will open the Settings page and display the Remote Data Stores tab.
-
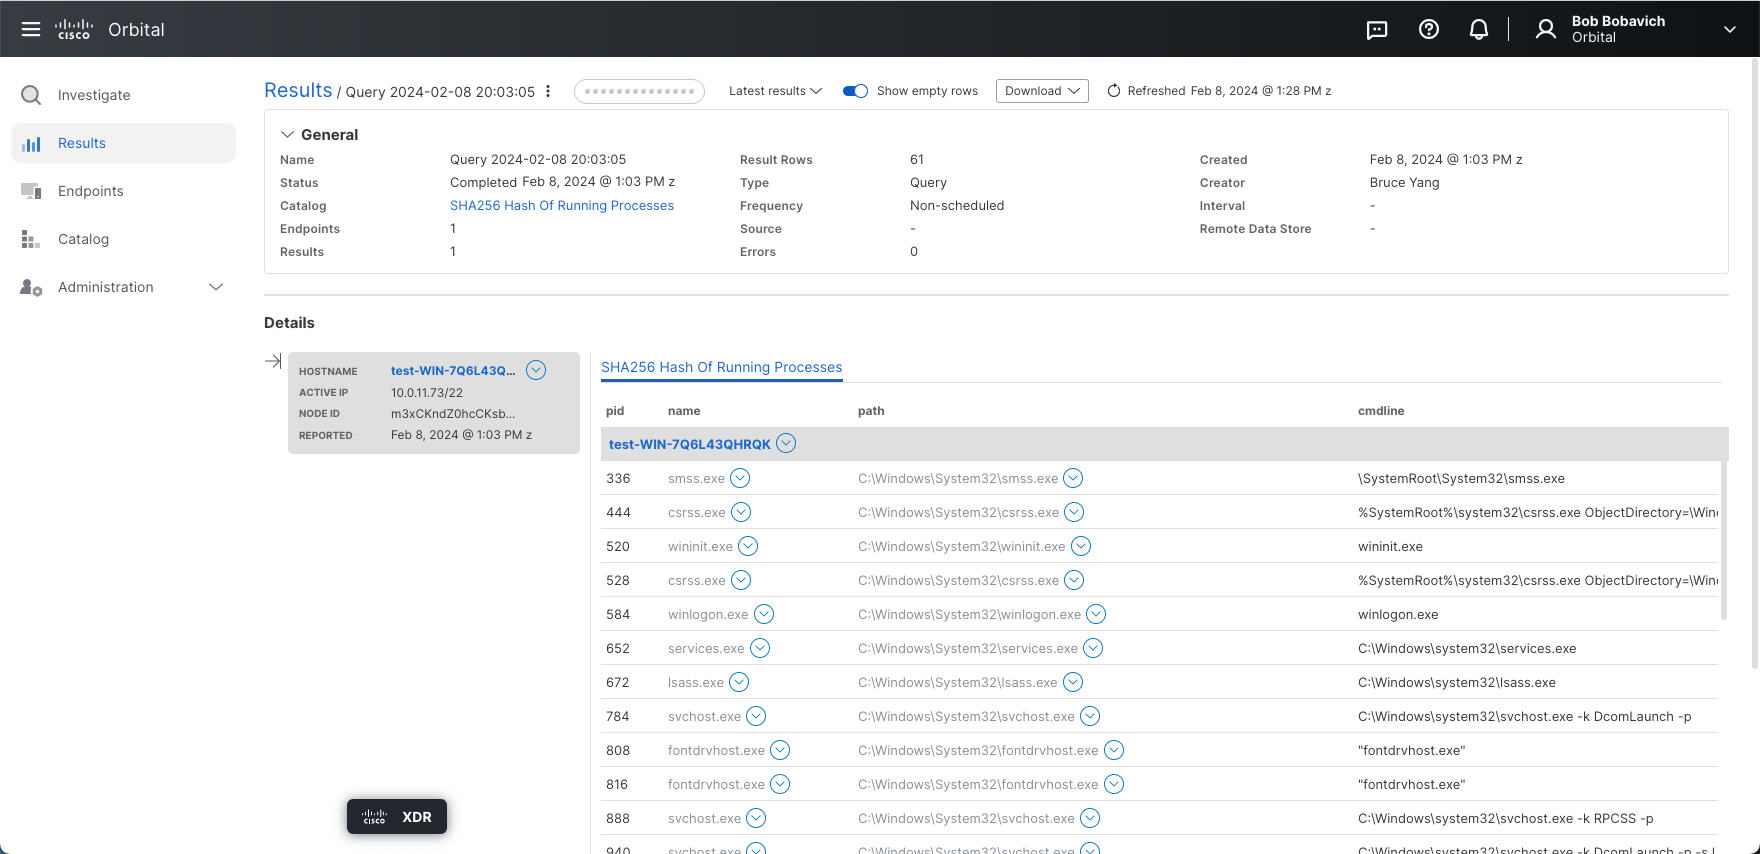
Selecting the Go to Result toggleswitch will redirect you to the Results page (shown in the figure below) and display the script's results for that job once you have started the script's run. This has the benefit of immediately viewing the results instead of having to migrate to the Results page, then find and select the results from the list of jobs.
-
Start or abandon the script's schedule.
-
Click Schedule to begin running the script's schedule. Clicking this button with remove the Schedule Orbital Script popup from the screen and start the script. Once you have started the script, you can see it listed on the Results page.
-
Click Cancel to abandon the script's schedule. Clicking this button will remove the Schedule Orbital Script popup from the screen and discard any parameters you might have set.

| Note: | The default schedule is to run the job once in 24 hours. |

or
How to Select Multiple Remote Data Stores
There may by times when you wish to sent the results of a script to more than one remote data store. In order to assign more than one remote data store to a script's schedule:
-
Click the Remote Data Store dropdown to expand it.
-
Navigate to the desired remote data store listing.
-
Select the desired remote data store so that it is displayed in the Remote Data Store dropdown's field.
-
Expand the Remote Data Store dropdown again.
-
Navigate to the next desired remote data store listing and select it.
-
Repeat until you have selected all of the required remote data stores.
| Note: | In order to delete a remote data store listing, click on the X beside the data store's name. |